TOTAL PAGEVIEWS

Search This Blog

Translate

Saturday, 23 November 2019

Soft Wholemeal Bread | No Butter, No Sugar | Very Healthy Whole Wheat Sandwich (The Best Homemade Bread Recipe)


This wholemeal bread loaf is made without butter and sugar. Here's the best wholemeal bread is rich in flavour and packed with nuts and seeds. try pumpkin seeds, poppy, linseed or peanuts. Also can lose weight, lower cholesterol and more. The softest, fluffiest and healthy bread you will ever eat, free from artificial ingredients and preservatives. There's nothing better than freshly baked bread.

Makes 1 
Ingredients

(A)
To make the roux:
• 140g water, cold
• 25g bread flour

(B)
• 140g water roux
• 70g cold milk
• 40g pure honey, optional
• 1 tsp, 4g allinson yeast
• 220g bread flour
• 60g wholemeal seed & grain flour
• 20g-30g chopped walnuts & sunflower seeds
or any seeds or nuts you like, optional
• a pinch of sea salt

(C)
1/2 tbsp, mild olive oil for baking
or 15g butter, room temperature

Method:
1) In a saucepan, mix water and bread flour together until combined to avoid lumps. cook until thickened and smooth paste forms. The roux can also stored in the freezer for a month or fridge up to 3 days if you making for a few batches just triple the recipe in above.

2) Add water roux, cold milk, honey, and the yeast into a large bowl. combine bread flour, wholemeal seed & grain flour, chopped walnuts and sunflower seeds with sea salt. Use a spatula to stir until well combined. before kneading rest for a few minutes.

3) Kneading a bread dough by hand about 10 minutes to form adequate gluten. slowly adding oil to the dough as it is kneaded prevents sticking. Your dough should be smooth and elastic when it’s ready. Place the dough in a lightly oiled bowl, flip the dough over to coat it in oil, then cover with a sheet of cling film. Cold rise overnight in the upper of the fridge. or cover with a wet cloth and leave in a warm place until doubled in size, this will take about 1 hour.

4) Once doubled in size, knock out the air bubbles, divide the dough into three pieces and shape into balls. roll each ball piece into an long oval. fold one side of dough over to halfway across the remaining dough then fold the other side on top.   Repeat with the other balls of dough then arrange them in an oiled loaf pan, seam side down.

5) Second rise in the warm oven for 45 minutes to 1 hour until it has nearly doubled in size again. Gently press a finger into the loaf to check if it has had enough proving time.

6) Heat fan oven to 150°C. Place on a lower rack and bake for 30-45 minutes, when removed from the tin and tapped on the base. Let the bread cool completely. The bread can be stored at room temperature, it will stay fresh in an airtight container or resealed bag for a couple days or frozen for up to a month or so.


Helpful Tips:
1) You still can use the same recipe and knead by hand or stand mixer instead.
2) These are best eaten within a day. Leftover breads can store in an airtight bag. It can also be frozen for up to 1 month, defrost and reheated in a toaster or hot oven. 
3) Yeast is best stored in the refrigerator, as the fungud in it will be killed at high temperatures. Before using yeast check the production date and storage life of your yeast. Refrigerate it as soon as possible after each use. The main cause of bread falling to rise is bad yeast.
4) The best way to store bread for freshness is in the freezer for about 1 month. after defrost the bread, reheating and serve, tastes like fresh-baked. 
5) It's recommended to use an oven thermometer.
6) If it's a winter day, the common problem is that dough won't rise. Using a warm oven by turn your oven on and off for a minute or with boiled water on the underneath to help your dough rise perfectly. 
7) Butter is better, because it's safe, fresh and real food. only little bit unhealthy saturated fats. Margarine is deadly, because of trans fats. You should probably just use 2 tsp or 1 tbsp rapeseed oil or mild olive oil instead to raise your good cholesterol and lower bad cholesterol, replace carbohydrates with fat.

Recipe Source: Josephine's Recipes


Wednesday, 13 November 2019

Super Moist Butter Raisin Cupcakes - Raisin Muffins Recipe

Quick and easy to make, the crunch of the muffin tops with raisins. these really made me happy. I love a good muffin that gets a fabulous crispy edge and moist buttery sponge texture. These raisin muffins are flavoured for a sweet treat, but not super-sweet or loaded with sugar. I have used this recipe for many years, this time I have managed to make 7-8 muffins, twice to make 14-16 muffins. depends on the size muffin pan you use. No fail and the best muffins I have made, so far! They have a taste that really brings me back to my own childhood. Happy baking everyone!

Love,
Josephine

Makes 7-8 muffins
Ingredients
• 2 large, 120g eggs
• 50g, 3 tbsp granulated or light demerare sugar, optional 
• 120g, 12 tbsp sifted plain flour
• 1 tsp baking powder
• 1 tsp vanilla essence
• 60g fresh milk
• 60g melted butter
• a pinch of sea salt
• 120g flame raisins
• 1 tbsp honey

Method:
1) Soaked flame raisins in hot water, drain and add tablespoon honey and stir well.

2) Beat egg and sugar until thick and fluffy. Add in sifted plain flour and baking powder. Add vanilla essence, milk and melted butter and a pinch of sea salt. whisk together until well combined. Add  raisins into the batter and remaining sprinkle on top.

3) Spoon the muffin mixture into paper cases. Bake in no preheated oven 150°C for 20 minutes, sit in the oven for 5 minutes, Do not over bake, if not your cake will turn out dry. So make sure you're keeping an eye on the cake. Best made and eaten on the same day. It's always delicious when it's warm, this reminds me of super moist butter cake and extra sweetened raisins, that will warm you from the inside.

Helpful Tips:
1) For guaranteed results it's important to follow exactly this recipe and baking at the right temperature is important. It's recommended to use an oven thermometer.
2) Please understand that everyone's oven work differently. You should also check the temperature of your oven. if not, your cake won't rise well. 

3) If lower the oven temperature to 130°C /100°C and bake for 20 minutes, the muffins seem generally less brown.
4) Do not use expired and old baking powder. 
5) If you use too little baking powder and they won't rise enough, use too much and they will rise quickly and then collapse. my suggestion is before baking, you can rest it for 5-15 minutes and let the rise that makes them EXTRA fluffy. 

Recipe Source: Josephine's Recipes


Saturday, 26 October 2019

EASY Matcha Green Tea Ice Cream Recipe


You don't have to own an ice-cream maker to enjoy this frozen treat.  Learn how to make homemade ice cream just four-ingredients.

Ingredients:

6-8 tbsp whole milk
2 tbsp matcha powder
300 ml whipping cream, cold
180g condensed milk

1) Chill the whisk and mixing bowl in fridge for about 15 minutes.
2) Heat the milk in a saucepan, sieve matcha powder, stir well and set aside to cool.
3) Pour the whipping cream into the cold mixing bowl.
4) Use low speed to beat for 1 minute. Increase to medium high speed and beat until soft peaks form.
5) Fold into the matcha mixture and condensed milk until well combined. Transfer into an airtight container. Cover and freeze for at least 6 hours or overnight.

Recipe Source: Josephine's Recipes


Tuesday, 22 October 2019

Homemade Salted Duck Eggs 腌咸鸭蛋 ~ 出油起沙的咸蛋 ~ 方法简单,一看就会 如何腌出好吃的咸鸭蛋?水腌较慢,但腌得均匀


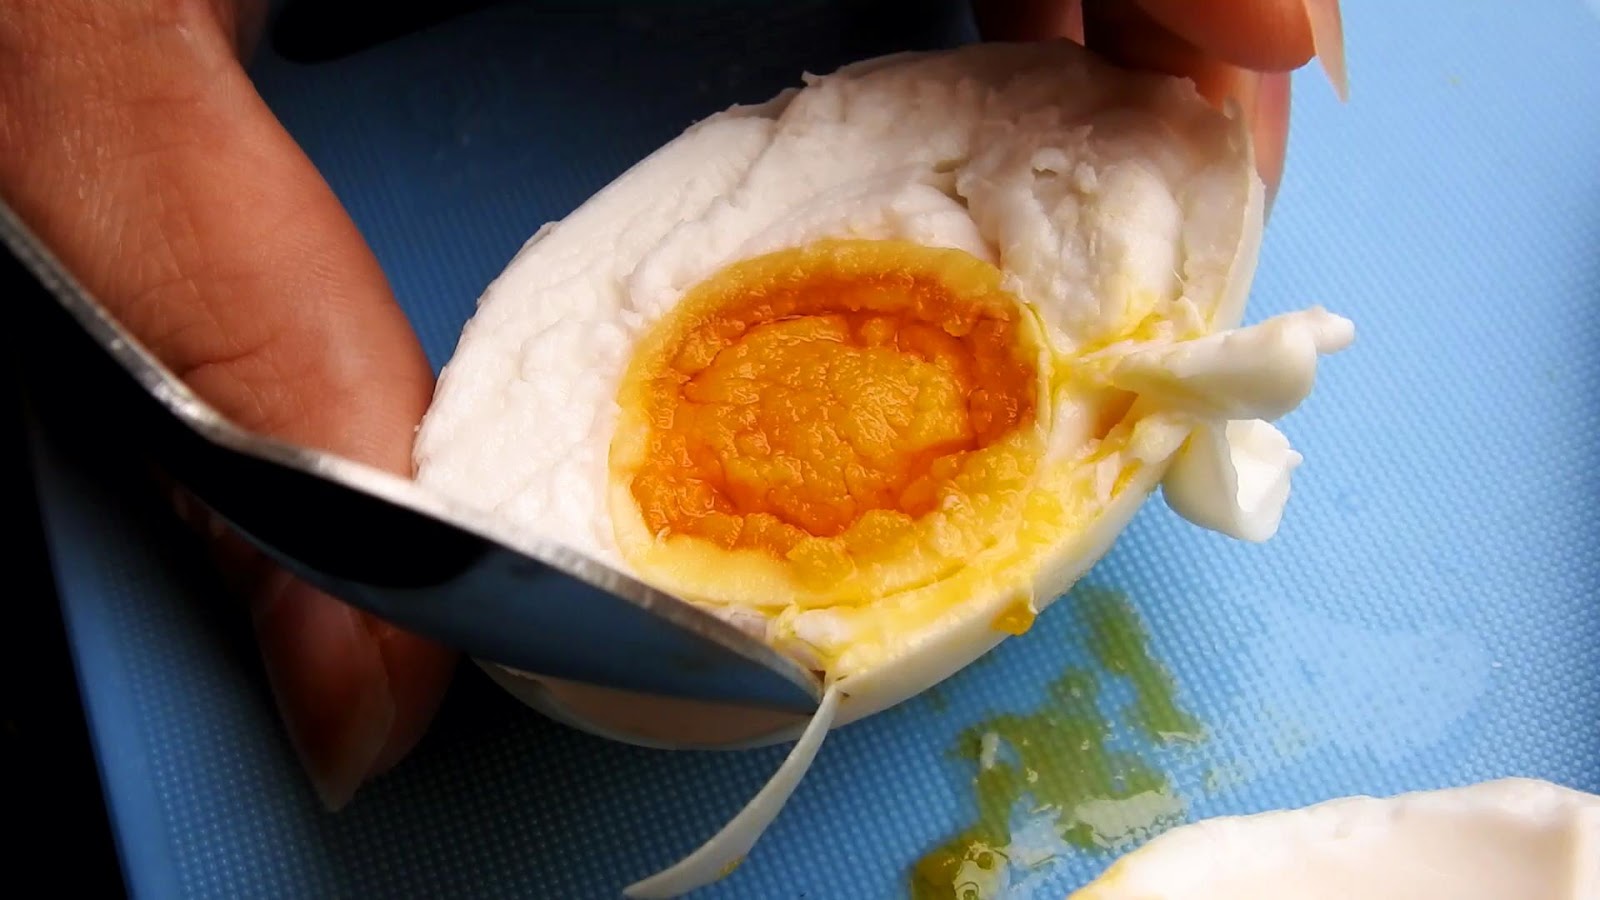
Homemade salted duck eggs taste better than commercial shop-bought. They are usually expensive and poor quality. yours salted eggs are oily, creamy and fragrant. It normally boiled and perfect for morning congee or take it out the yolks for steaming and use for others Chinese dishes like a classic combination of minced pork or steamed eggs, a mooncake or sticky rice dumpling fillings. They taste super good, delicious and this savory into a truly show-stopping appetizer.

Ingredients
24 duck eggs
3 cups salt 
5 cups water
3 star anise
brandy or whisky

Method:
1) Add salt, water and star anise in a casserole until it is boiling.
2) Stir until the salt has melted and keep boiling until you see lots of salt crystals start to form in the side of the casserole, turn off the heat and let it cool down to room temperature.
3) Dip a clean cloth or paper towel into the brandy or whisky.
4) Lightly rub off the remaining dirt from the eggs and carefully arrange the eggs in the container.
5) Add enough cooled salt water to cover the eggs, so they are completely submerged.
6) Store in a cool, dry place for 30 to 45 days.
7) You can cook one after 30 days and see if it's done. it helps to label the jar with the date. once all are done, storing your salted eggs in the refrigerator will keep them to be consumed in a month.

Enjoy!
♥
Copyright © Josephine's Recipes. All rights reserved.
No part of this video (including thumbnail images or written recipe) may be reproduced or transmitted in any form or by any means, electronic or mechanical, without the written permission of the copyright holder.


Friday, 18 October 2019

How to Make Crispy Fried Shallots / Onions in the Air Fryer


Crispy fried shallots are an essential condiment in my hometown. They turn up aromatic in dry wonton noodles, soups and on congee, sprinkled onto dumplings as a garnish. Whatever you would like to deep-fried just as easily be made in the air-fryer with less oil or even no oil at all, you’re gonna like this one. Meet the air fryer, the miracle kitchen gadget, that truly is healthier than deep fryer you can make at home.

Ingredients
600g shallots, cut into sliced
mild olive oil for brushing the air fryer basket

Directions:
1) Slice shallots into thick rounds.
2) Lightly brush oil. transfer shallots to the air fryer basket or spray with the oil and toss to coat them. Slide the basket into the air fryer. 
3) Adjust the temperature to 120C and set the timer for 5 minutes. when the time rings, slide out the basket and stirring occasionally the shallots again every 5 minutes. Fry until golden brown about 30 minutes in total. Allow fried shallots to cool completely before storing in air tight jar. you can store them in the refrigerator or well-ventilated place and keep for about a month.

Recipe Source: Josephine's Recipes

Tuesday, 15 October 2019

The Best Dolsot Bibimbap Recipe - Korean Stone Pot Bibimbap


Bibimbap is one of the best South Korean food and dishes that you can't miss in Seoul. Honestly, it’s almost a staple that you have to try (just like their fried chicken). Truth be told, now you can make your own Bibimbap at home, Korean Bibimbap is made from a mix of fluffy steamed rice,  a mix of sesame fried vegetables,  that's probably why I've been dying to develop my own recipe for it and a spicy red pepper paste that has a total zing to it.

Ingredients (serves 2-4)
200g rib eye steak, beef
1 cucumber, cut into thin strips
1/2 chinese leaf, optional 
3 medium carrot, cut into thin strips
115g shiitake mushrooms
100g bean sprouts, washed and drained
180g baby spinach, optional
2 eggs, free range
1 tbsp vegetable oil for frying eggs
a tsp sesame oil for frying each vegetable 
4 tbsp gochujang, hot chilli pepper paste, CJ Haechandle brand
sprinkle some toasted black or white sesame seeds
steamed white rice for 2 persons

Sauce for stir fry or drizzle over bibimbap 
1 tbsp brown sugar
2 tbsp hot water
2 tsp light soy sauce, kikkoman
1 tsp oyster sauce, lee kum kee premium
1 tsp sesame oil

Method:
1) Boil the rice following packet instructions. Meanwhile heat a tsp sesame oil in a frying pan then add cucumber and stir fry until starting to soften then transfer to a bowl. Next add the Chinese leaf, carrot, shiitake mushrooms, bean sprouts, spinach and repeat until all vegetables are cooked through. Fry the eggs, adding a little extra oil if the pan is dry.

2) For meat, mix the steak with the sauce listed above, marinate for 30 minutes. Heat a pan over medium-high heat. fry the marinated meat pressing down with a spatula, until both sides are well browned. 


3) Put the steamed rice into a bowl and add the cooked beef, assorted vegetables, the fried egg on top of the rice, scatter the sesame seeds over the top. the best way to eat, it is serving gochujang, break into the egg and stir everything together so the sauce and the runny egg yolk get deliciously mixed up with all the vegetables and steak in the bowl and enjoy!

Recipe Source: Josephine's Recipes 


Saturday, 12 October 2019

Pan Fried Fish Recipe - Pan Fried Fish Chinese Style


One of my absolutely favourite lunch and serve with steamed white rice is with pan-fried fish with garlic, ginger, spring onion and dark soy sauce is one of the most classic Chinese meals to enjoy.

Ingredients
500g, 4 fish fillets
pinch of sea salt
pinch of white pepper
1 tbsp sesame oil
3 tablespoon olive oil, mild for frying
potato or corn starch, to dust the fish
1 inch ginger, peeled and thinly sliced
4 cloves garlic, cut into small pieces, minced
2 spring onion, sliced diagonally

Sauce
dark soy sauce, pearl river bridge

Method:
1) Sprinkle each side of the fish fillet with salt, white pepper, sesame oil and light soy sauce. Dust each fish fillet with potato starch or corn flour. If you don’t have them, simply dust the fish fillet with plain flour.

2) Heat the oil in a wok, over medium high heat, fry the fish for 3 minutes each side until golden brown, in the same pan, stir fry garlic, ginger, and scallion until fragrant and crisp, pressing down gently, then flip, about 3 minutes each side. Remove from the pan and set aside. Set the fish on a serving plate. Pour the dark soy sauce onto the fish. Serve immediately with steamed white rice.

Recipe Source: Josephine's Recipes