TOTAL PAGEVIEWS

Search This Blog

Translate

Monday 14 December 2015

How To Make Super Cute Emotional Bread Buns | Chinese Bakery Soft Bread Buns - Josephine's Recipes 165


 Printable Recipe

Makes 8 large or 16 medium sized

Day 1:

(A)

In a bowl, Add 1 cup warm milk1 tsp sugar and 1 tsp yeast, Stir together. Add 1 whisk egg, stir again. Slowly add 2½ cups bread flour2 tbsp sugar. Knead until well combined. then add the 35g soften butter, knead vigorously for a good 5 minutes. Kneading up to down for about 10 minutes.

(B)
Transfer the dough on a clean floured worktop, beat the dough by hand for 15 - 30 minutes, or until it is smooth, soft and elastic. Once it starts to stop sticking to the surface. You can also check the gluten development with the windowpane Test: pull off a chunk of dough and stretch it with your hands. if it break, repeat step. It should stretch to form a very thin translucent sheet, without tearing.

(C)
Cover the dough with the lid and allow to cold rise in the lower part of a fridge overnight.

Day 2:

(D)

Take the dough out of the fridge. then Placing the dough in the oven, and put a cup of hot water to have a nice balance, warm and moist environment and rest for 2 hours until triple-sized as recommendations.

(E)
Cut the shape as desired. This bread recipe can be substituted for any types of your favorite fillings. Once shaped, Let them rise again in the oven for 35 minutes. (Do NOT TURN THE OVEN ON).

(F)
Preheat the oven to 150°C, Bake for 30 minutes. In a small bowl, add 2 tbsp golden syrup 1 tbsp water, and stir well. Brush after middle baking and before 5 minutes done and can brush again after baking. For the shine, you'd have to brush it on after baking. These cute buns eye and mouth is draw with melted chocolate. Each of them looks different expression.


Recipe Source: JosephineRecipes.Co.Uk


Monday 16 November 2015

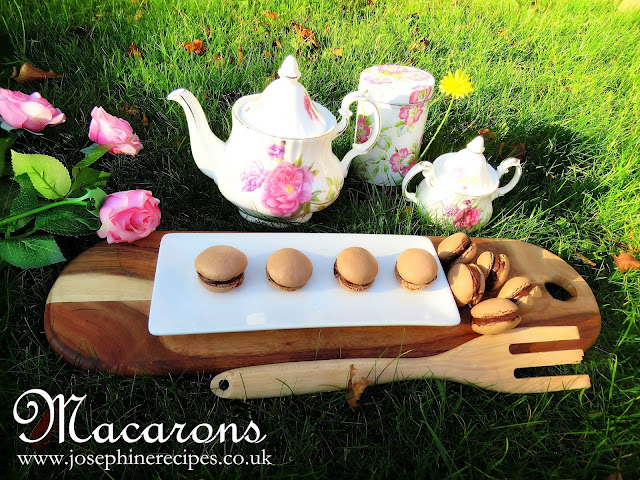
Learn How To Make French Macarons | French Meringue Method | 法式马卡龙 - Josephine's Recipes 164


Before this, I have tried and failed many times to making macarons. after several experiment in the kitchen, I found one that worked for me, I am super excited and really grateful can be a part of macaron maker, based in our homemade. so, I just keep to making successful multiple batches of macarons almost everyday for a week. So here's what exactly I did and you can making it without fail, and brighten your day. Enjoy and Happy Baking!

Makes 9 - 10

(A)
40g almond flour
49g icing sugar
1 drop food coloring

(B)
33g aged egg white
25g caster sugar

Method:
1)  Place the almond flour and icing sugar in a food processor and blend them very fine until combined and no lumps.

2) Pour the aged egg whites into a clean bowl and whisk until it begins bubble to form, and switch to a medium high speed, add caster sugar a little at a time till all the sugar has been added. when you lifted out of the egg whites,  the firm peak will stand.

3) Add the super fine ground almonds mixtures into a beaten egg white, Using a rubber spatula, gently fold half by half together until well combined. Separate the batter, and add one drop of food coloring if desired.

4) Use a mug to hold the piping bag, Spoon the batter into the bag until full enough. place the silicone macaron mat of your choice onto a baking tray and holding the piping bag vertically over the macaron mat, slowly squeeze the mixture onto the matBang the pan or mat a few times and Carefully prick any visible surface air pockets with a skewer.

5) Leave for 2 hours in a cool place until the batter doesn't stick to your hand. Preheat the oven to 130c with up/down fan, Bake for 35 minutes till cooked and remove from the oven. Leave to cool.

6) When cool remove the macarons from the mat and place ready to sandwich. This can also be either unsweetened blueberry and strawberry jam filling etc. The choice is endless only as much as your imagination. The macarons are now ready to enjoy.

Helpful Tips and Advice:
1) Use cold aged egg whites.
2) Use a fan oven to speed up the drying process.
3) Do not overmixed the batter, the macaron shells will have no feet.
4) Don’t bake the macarons at high temperature, they'll cracking and not forming feet.
5) Do not try to remove from the mat whilst still hot as the macarons will break apart.
6) Over bake, the shells seems too dry crunchy but it's way better than under bake. Once you've filled sandwiched the macarons, Let them continue ripen and store in the fridge. They're softened perfectly.
7) Homemade macarons is without preservatives, so you can store them in airtight containers, it can stay fresh in the refrigerator for 3 -5 days. For longer storage, you can freeze the macarons for as long as 3 months and defrost for about 25 minutes. The taste just as fresh as when you first made them.
8) Place on a serving plate and dust with a little decoration as you desired.

Recipe Source: JosephineRecipes.Com

Friday 6 November 2015

How To Make Chocolate Macarons | French Macaroons | 法式马卡龙 | 朱古力馬卡龍 - Josephine's Recipes 163


Before this, I have tried and failed many times to making macarons. after several experiment in the kitchen, I found one that worked for me, I am super excited and really grateful can be a part of macaron maker, based in our homemade. so, I just keep to making successful multiple batches of macarons almost everyday for a week. So here's what exactly I did and you can making it without fail, and brighten your day.

Makes 9 - 10


(A)
40g almond flour
49g icing sugar
1 tsp cocoa powder

(B)
33g aged egg white
25g caster sugar

Method:
1)  Place the almond flour, icing sugar and cocoa powder in a food processor and blend them very fine until combined and no lumps.

2) Pour the aged egg whites into a clean bowl and whisk until it begins bubble to form, and switch to a medium high speed, add caster sugar a little at a time till all the sugar has been added. when you lifted out of the egg whites,  the firm peak will stand.

3) Add the super fine ground almonds mixtures into a beaten egg white, Using a rubber spatula, gently fold half by half together until well combined.

4) Use a mug to hold the piping bag, Spoon the batter into the bag until full enough. place the silicone macaron mat of your choice onto a baking tray and holding the piping bag vertically over the macaron mat, slowly squeeze the mixture onto the mat. Bang the pan or mat a few times and Carefully prick any visible surface air pockets with a skewer.

5) Leave for 2 hours in a cool place until the batter doesn't stick to your hand. Preheat the oven to 130c with up/down fan, Bake for 35 minutes till cooked and remove from the oven. Leave to cool.

6) When cool remove the macarons from the mat and place ready to sandwich. Add chopped chocolate or chips into the piping bag under the mug, and melt from direct of the 55c warm water. Once the chocolate is melted. Snip a small hole and ready to squeeze for the filling on one place onto the flat underside. This can also be either butter cream, jam or salted caramel filling etc. The choice is endless only as much as your imagination. The macarons are now ready to enjoy.

Helpful Tips:
1) Use cold  aged egg whites.
2) Use a fan oven to speed up the drying process.
3) Do not overmixed the batter, the macaron shells will have no feet.
4) Don’t bake the macarons at high temperature, they'll cracking and not forming feet.
5) Do not try to remove from the mat whilst still hot as the macarons will break apart.
6) Over bake, the shells seems too dry crunchy but it's way better than under bake. Once you've filled sandwiched the macarons, Let them continue ripen and store in the fridge.They're softened perfectly.
7) Add chopped chocolate or chips into the piping bag, and melt from direct of the warm water. Once the chocolate is melted. Snip a small hole and ready to squeeze for the filling.
8) Homemade macarons is without preservatives, so you can store them in airtight containers, it can stay fresh in the refrigerator for 3 -5 days. For longer storage, you can freeze the macarons for as long as 3 months and defrost for about 25 minutes. The taste just as fresh as when you first made them.
9) Place on a serving plate and dust with a little decoration as you desired.

Recipe Source: JosephineRecipes.Co.Uk

Thursday 1 October 2015

How To Make Ondeh Ondeh | Sweet Potato Glutinous Rice Balls | Mochi | 椰丝糯米球 | 糯米糍的做法大全_椰丝红薯糯米糍


Makes 28 (Small)

Ingredients: 
1 cup glutinous rice flour 
¼ cup wheat starch
3 sweet potatoes, about 520g 
(cooked and peeled)
1 tablespoon corn oil 
1 pieces coconut sugar 75g 
(chopped)

shredded coconut, for coating
(steamed)

- No Water Required -

Method:
1) Breaking up coconut sugar with a pestle & mortar.

2) Wash the sweet potatoes in running water. Put the potatoes into a saucepan, cover with cold water and bring to a boil over high heat. Once boiling, reduce the heat to medium-low and simmer until the potatoes is tenderness. Once cooked, Peel the potatoes and mash them without mercy.

3) In a large bowl, add 1 cup glutinous rice flour and ¼ cup wheat starch, fold in mashes potato while is still warm.

4) Use your spatula to mix well until just combined. Add 1 tbsp corn oil, knead into a dough. 
Allow to sit and store in refrigerator for overnight.

5) In the next day, Roll and cut the dough into 16 equal portions, filled and wrapped with some chopped coconut sugar. Shaped into a small balls, repeat this step with the remaining dough. 

6) Bring a pot of water to boil. Gently drop the rice balls into the boiling water and cook until they float to the surface.

7) Drain out the balls and roll each with shredded coconut to coat evenly. 
Serve and Enjoy!

Helpful Tips:
1) Let the dough sit in the fridge overnight, It seems like gives this glutinous rice balls flavour and a delightfully chewy texture.
2) Put the uncooked Tangyuan in freezer bags zip slide or containerand can be frozen within 1 to 3 months for best flavor and quality.

Recipe Source: JosephineRecipes.Co.Uk

Saturday 26 September 2015

How To Make Super Soft and Chewy Chinese Bakery: Red Bean Paste Filling For Snow Skin Mooncakes 红豆沙 冰皮月饼 彩色冰皮月饼 糯米糍 - Josephine's Recipes 162


We made these super soft and chewy snow skin mooncake sold at Chinese bakeries.
It's Super flavorful and making it a perfect day. There are so many ways to eat with the same recipe to achieve different textures. It's similar to a 糯米糍 chinese glutinous rice balls stuffed with red bean paste, 麻糍 muah chee or mochi.

Ingredients:

(A)
Snowskin:
6½ tbsps glutinous rice flour 糯米粉
3 tbsps rice flour 粘米粉
2 tsps wheat starch 澄麵粉
160ml coconut milk 椰奶
4 tbsps condensed milk 煉奶
20g melted slightly salt butter 牛油
3 tbsps cooked glutinous rice flour, for coating 熟糯米粉 (糕粉是防黏用)

(B)
Filling:
Red bean paste
Get the recipe from here

Method:
1) Transfer all the flour from the sieve to a mixing bowl. Add coconut milk and condensed milk, mix until combined before adding in melted butter. For an extra smooth, strain the mixture through a sieve directly into a stainless steel plate, and transfer to the steamer. Cover with safe-heat aluminum foil, and steam for 25 minutes over medium low heat. Allow to rest for a few minutes and flatten it with a rolling pin until well incorporated. Place dough to be easy to knead inside a food bag and simply add food coloring, one drop at a time for one dough and knead until well combined then wearing gloves is necessary.

2) Divide the snow skin dough into 8 equal portions. Pat each into a round and place a portion of the filling in the center, wrap them tightly and secure them. Sprinkle with cooked glutinous rice flour. Place it in the floured mooncake mould, tap for 2 to 3 times, and press the mooncake out. Transfer to the serving plate covered with plastic wrap or airtight container and refrigerate in the fridge for 2 hours until needed. Do not stored in the freezer. and the snowskin will become hard, freezing is not advised quality point.

Recipe Source: JosephineRecipes.Co.Uk


Helpful Tips:
Colourworks Five Piece Measuring Spoon Set
http://www.amazon.co.uk/Colourworks-Five-Piece-Measuring-Spoon/dp/B003SZU66W/ref=sr_1_16?ie=UTF8&qid=1443113788&sr=8-16&keywords=measuring+jug

Colourworks Three Piece Measuring Jug Set - Red
http://www.amazon.co.uk/Colourworks-Three-Piece-Measuring-Jug/dp/B00519SSTK/ref=pd_sim_sbs_201_6?ie=UTF8&refRID=1SYCR7X6PG1J3FBDRPTZ&dpID=51tI0eRv%2BjL&dpSrc=sims&preST=_AC_UL160_SR160%2C160_

100 Pcs Food Service Hand Protective Plastic Disposable Gloves Clear http://www.amazon.co.uk/gp/product/B00AO3Z6HU?keywords=plastic%20hand%20gloves&qid=1443120839&ref_=sr_1_1&sr=8-1

Gel Food Coloring Set 4/Pkg-Neon
http://www.amazon.co.uk/gp/product/B007EMYD8M?psc=1&redirect=true&ref_=oh_aui_detailpage_o02_s00

Monday 21 September 2015

How To Make Sweet Red Bean Paste | Black Bean Paste | Adzuki Bean Paste 豆沙 | 傳統豆沙餡 | 红豆蓉 - Josephine's Recipes 161


This was absolutely one of my all time favourite fillings, it had addicting bakery aroma, they just tasted like heavenly, slightly aroma, and average sweet, wasn't too sweet and better balanced. It commonly called 豆沙 is a sweetened red bean paste often used as a filling in breads and pastries.

Ingredients:
(A)
• 3/4 to 1 cup adzuki beans
• 4 cups cold water
• 2 brown sugar in pieces or 1 cup golden granulated sugar + 1-2 tbsp dark muscovado sugar
• 10g-25g slightly salted butter, as you prefer

(B)
• 1 tbsp corn flour + 2 tbsp cold water
stir well and set aside.

Method:
1) Wash and rinse the adzuki beans several times under running water and soak for 30 minutes or overnight, drain the water.

2) Adding clean water, cook over medium heat for about 90 minutes. before 15 minutes, Add sugar, corn flour mixture and continue cooking until done. 

3) Allow to cool completely and put into a blender and blend on high speed until smooth paste. 

4) Heat up the pan and melt the butter a little bit. Add red bean mixture and reduce heat to middle low, stir until it thickens about 45 minutes to 1 hour. It depends on your pan size, some might work much faster or slower.

5) Let the red bean paste, cool completely before putting it in the fridge, coldest part and keep it for 5 days or freeze for up to 1 month. To allow them to soften at room temperature. Refreezing is not advised from either a safety or quality point of view. Divide the red bean paste into portions of rough balls or whatever you desire.

Helpful Tips:
If you don't inclination to stand at the stove, you'll at least come back every 15 for repeat the stirring process and keep an eye on the stove in case the red bean paste will burn. 
Friday 18 September 2015

No-Churn Coffee Ice Cream | Homemade Ice Cream - Josephine's Recipes 160


This recipe doesn't need an ice cream machine. A quick and easy way to make your own coffee ice cream at home. It has an incredibly rich, smooth and creamy texture.

Makes 2:
Tesco Klipfresh Foodsaver 450ml
http://www.mysupermarket.co.uk/Shopping/FindProducts.aspx?Query=container

Ingredients:
2 tbsps kenco instant coffee
4 tbsps hot evaporated milk
300ml fresh whipping cream
170g sweet condensed milk
2 tbsps tesco cocoa powder

Method:
1) Chill the mixing bowl and whisker in the fridge, allow to cool at least 15 minutes.
2) In a saucepan, heat the milk and add the kenco instant coffee, stir well and set aside.
3) Pour the cold whipping cream in the mixing bowl, Use a low speed to beat for 2 minutes, and add condensed milk for 3 times, increase to medium speed and slowly to pour the coffee mixture, also add the cocoa powder and continue beating until the cream reaches stiff peaks. Adjust the sweetness to your own taste. Pour the ice cream mixture into a freezer safe, airtight container and place in the freezer overnight.

Recipe Source: JosephineRecipes.Co.Uk

Friday 4 September 2015

How To Make Rose Cake | Chinese Bakery Birthday Cake | Mixed Fruit Cream Cake 鮮忌廉雜果蛋糕 Josephine's Recipes 159


Makes 3 Layers
For the cake:
Ingredients:

(A) Egg yolks:
• 6 egg yolks
• 4 tbsps sugar
• 2 tbsps milk powder
• 100ml fresh milk
• 1 tsp vanilla extract
• 2 tbsps melted butter

• 1 cup cake flour

• 2 tsp baking powder

(B) Egg whites: 
• 6 egg whites
• ½ tsp cream of tartar
• 6 tbsps sugar

(C) Filling:
568ml Elmlea Double Cream Alternative
2 tbsps sugar 
Some hand cut fresh fruits, as you desired

Method:

1) In a large bowl, add egg yolks, sugarmilk powder, fresh milk, melted butter, vanilla extract and Stir until well combined. Sift in the cake flour and baking powder into the egg yolk mixture. Stir until smooth and Set aside.

2) Use another large clean bowl, add egg whites, 
beat the egg whites with an electric mixer until barmy, Add cream of tartar, continue beating for a few seconds. Add sugar for 3 times
beat them to half solid until truly stiff form. 

3) Gently fold the egg yolks mixture into the whipped egg whites, 
until all of the ingredients are evenly incorporated.

4) Gently pour the batter into greased round foil flan cases. 
then '' bang '' it on the work surface a few times to expel any large air pockets.

5) Preheat the oven, Set the temperature to150°c
Bake for 25 minutes or until well-risen, golden-brown. Carefully remove the cake from the oven and let it cool completely.

6) In the meantime whip the double cream until fluffy. 
Refrigerate it before using if needed. 

7) Once the cake is cool, remove the cake from the cases. 
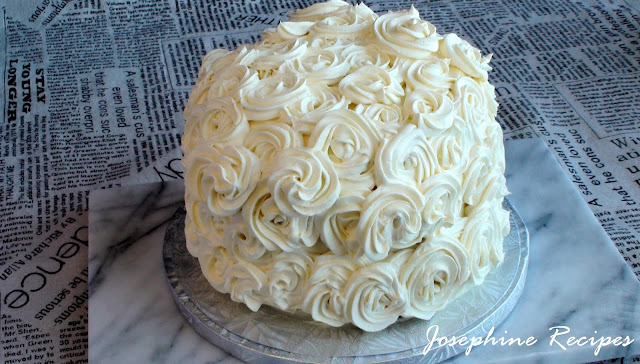
Spread the fresh cream and place some mixed fruit. *Refrigerate it before using if needed. Decorate with fresh fruits on top or without the fruits, just like rose cakeThe roses on the cake are exactly the same as the ones in the video.


Recipe Source: JosephineRecipes.Co.Uk

Saturday 22 August 2015

How To Make Fried Chinese Breadstick | 油条 Youtiao Chinese Crullers | Chinese Street Food 油炸鬼製作方法 Josephine's Recipes 158


There are five stages to learning a new skills & techniques. This is Fried Chinese Crullers, YouTiao, Yu Char Kuih, Yau Char Kwai, and also known as Chinese Breadsticks.

Ingredients:
Step:
(A)
1 cup bread flour
1 tsp bicarbonate of soda
1 tsp baking powder
 1 tsp salt

(B)
½ cup warm water
1 tsp sugar
½ tsp allinson easy bake yeast

(C)
1/2 cup bread flour for sprinkle over and kneading
2 tbsps oil (vegetable, corn or peanut)
You can use any type of oil you prefer.

(D):

Oil for deep frying

Method:
A) In a large bowl, add 1 cup bread flour, 1 tsp bicarbonate of soda, 1 tsp baking powder and 1 tsp salt. Add the (B) yeast mixture to the flour and use a hand mixer (dough hook) on low to middle speed until the dough is well blended, then cover with plastic wrap and leave to rise in a warm place for 2 hours. or you can let the dough rise in the lower part of the fridge overnight instead; (cold rise at least 6 hours).

B) A glass of ½ cup warm water + 1 tsp sugar + ½  allinson easy bake yeast, and stir well.
Cover with plastic wrap and let sit in a warm place for 15 minutes or until bubbles arise.

C) Sprinkle some more flour over the dough, and transfer the soft and sticky dough onto a clean work surface and knead until smooth and elastic, about 10 minutes. Covered with a wet cloth. 
The second fermentation takes about an hour. Leave to rise in a warm place or in the oven under 40°c, the dough should rise until double or triple in sized. Add 2 tbsps oil, and knead it again for 5 minutes.

D) Roll out the dough on a well floured surface, Cut to shape and making conjoined dough twins. Using a bamboo sticks or chopstick, make a gutter in the middle of each strip and Pressing it down lightly. Pick up one double strip. Hold the two ends and stretch it. Repeat process with remaining pieces.

E) Fry in hot oil (at approximately 180°c) Gently flip it over continuously many times with chopstick, Keep flipping & frying until they have puffed up and become golden brown and remove. Drain off excessive oil or drain on kitchen paper before eating. It was traditionally served warm and Enjoy!

Helpful Tips:

1) The fermentation temperature, and time control are two very important
elements in making the perfect dough.
2) You can put the dough in the fridge overnight, so the next day, you can save a lot of time, just taking the dough out of the fridge and skip to the second fermentation for at least two hours.

WATCH THE VIDEO AND FULL RECIPE FROM BEGINNING TO END,
OR EVEN WATCH / READ MORE THAN ONCE BEFORE YOU BEGIN COOKING.
IF YOU'RE NOT SURE, WELCOME TO ASK

• ALL STEPS IS AN EXTREMELY IMPORTANT!


Recipe Source: JosephineRecipes.Co.Uk

Monday 17 August 2015

Super Soft and Fluffy Coconut Roll Buns | Chinese Bakery Buns 超軟椰蓉卷 麵包製作 - Josephine's Recipes 157


Makes 8 Chinese Coconut Roll Buns 

Ingredients:

(A)
1 cup warm milk 40°C
1 tsp active yeast
1 tsp sugar

(B)
2 cups bread flour
2 tbsp sugar

(C)
35g butter

(D)
1 tbsp golden syrup
+ 1 tbsp water

(E)
Coconut Filling:
3/4 cup Desiccated Coconut 
1/2 cup Icing Sugar 
35g Soften Butter 
2 Fresh Eggs 

In a bowl, combine all filing ingredients and mix until combined. You can use them immediately or keep in the fridge for overnight.

Method:

Day 1: 

1) Add 1 cup warm milk + 1 tsp yeast + 1 tsp sugar mix thoroughly together. Just cover it with the lid until bubbles arise.

2) In a large bowl, add 2 cups bread flour, 2 tbsp sugar, and soften butter, then add the (1) yeast mixture to the flour and mix well until combined. kneed till it forms a rough ball and a medium level of gluten has developed.

3) Cover the dough with the lid and allow to cold rise in the lower part of a fridge overnight.

Day 2: 

4) Take the dough from the fridge, Cover the dough with a wet and hot tea towel. It will help to balance the rising temperatures. Rest for an hour.

5) Use your finger test for dough, it will helps you to know exactly when bread has risen enough.

6) Transfer the soft and sticky dough on a clean, floured work surface, then kneading well and beat the dough by hand until it is smooth, soft and elastic. You can also check the gluten development with the windowpane Test: pull off a chunk of dough and stretch it with your hands. if it break, repeat step. It should stretch to form a very thin translucent sheet, without tearing.

7) Sprinkle some flour on the board surface so the dough won't be sticky. Add the coconut filling and roll up dough and pinch edge together to seal. Cut into slices as desired. Cover with plastic wrap and rise again in a warm place for about 1 hour or until doubled in size

8) Preheat the oven to 150°C, Bake for 25 minutes. Baking time depends on the size and shape of the bread being baked.

Helpful Tips:
Everyone's oven is different.
PLEASE UNDERSTAND YOUR OVEN!
You can follow these old fashioned hand kneading method or using machine, 
like stand mixer, food processor and bread machine instead.
Brushing the crust with melted butter, milk, whisked egg, 
or sugar water on the bread surface as you desired.
If your dough too tough and hard to knead, the problem you adding too much bread flour. 
If so, You must add warm milk or water to balance and rise again.

Recipe Source: JosephineRecipes.Co.Uk

Friday 31 July 2015

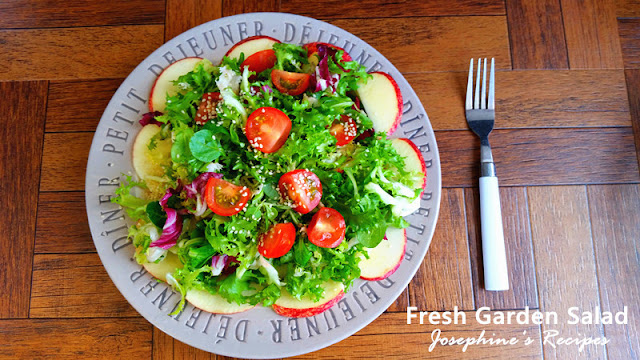
How To Make the Perfect Simple Salad with Balsamic Dressing | Avocado and Garden Salad with Balsamic Vinaigrette - Josephine's Recipes 156


Ingredients:
Florette Classic Crispy Salad
Buttered Sweet Corn
Tesco Cherry Tomatoes
Tesco Extra Large Avocados
Hard Boiled Eggs
Toasted Sesame Seeds
Tesco Gala Apples

Above are my top 7 favorites ingredients, washed/dried and ready to eat
and below are my top 3 favorites dressing/sauces. you can add whatever you like, if desired.

Dressing Sauces:
Hellmann's Balsamic Vinaigrette Salad Dressing
Sainsbury's Extra Virgin Olive Oil Infused with Garlic
Maggi Liquid Seasoning (optional)

The amount of quantity is that you can adjust as desired.

Method:
Add your favorites ingredients to a large salad bowl. Sprinkle with toasted sesame seeds,
and then spoon the dressings over to the whole salad and serve immediately.

Recipe Source: JosephineRecipes.Co.Uk

Monday 27 July 2015

How to Make Super Soft and Moist Cotton Cheesecake | Japanese Cotton Soufflé Cheesecake 轻乳酪蛋糕 - Josephine's Recipes 155


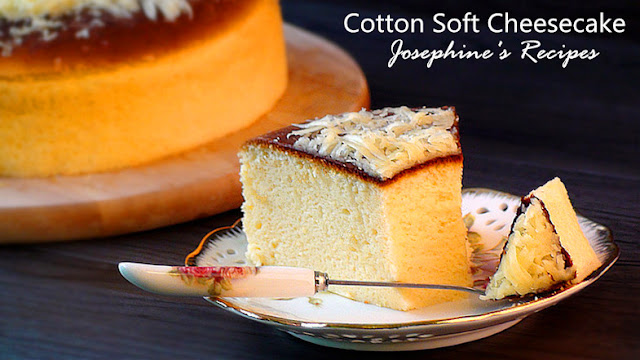
One bite, then you will fall in love with this super fluffy, cotton cheesecake has been my favourite for almost 20 years. Many recipes ask to refrigerate the cheesecake 1 to 4 hours. but I didn't chill it, allow to cool at least 15 minutes, and use a sharp knife to cut and serve the cheese cake along with a cup of hot coffee and enjoy.

Ingredients A:
360g cream cheese
150ml whole milk
3 tbsp sugar
4 egg yolks
4 tbsp cake flour
2 tbsp corn flour

Ingredients B:
4 egg whites
8 tbsp sugar

Ingredients C:
farm house mature cheddar
- for cake decorations

You will need 8-inch (20cm) round baking pan. Line with the prepared round of parchment paper in the bottom and the sides and grease with butter.

Method:
1) Melting cream cheese in double boiler, add the milk and sugar, stir until well blended. slowly adding the egg yolks and mixing thoroughly.

2) Add in sifted cake flour and corn flour, and beat well.

3) Whisk egg whites and add the sugar a bit at a time in another bowl until to a beautiful thick and fluffy. then,add the egg yolk mixtures and gently mix well.bang it on the work surface a few times to expel any large air pockets.

4) Pour the cake batter into 8 inch cheese cake mould and place them in a large baking tin. Add enough hot water in the tin and get ready for water bath.

5) Heating up and down the oven, or just put the pan on the middle rack and bake 8-inch cheesecake in a water bath for 1 hours 30 minutes or until set and golden brown at 150 degrees c. Everyone oven is different, understanding the way cake bakes will help you adjust your oven's setting to best effect.

6) Once cooked, leave to cool at least 15 minutes, remove from the oven, Sprinkle shredded cheddar cheese on top.  Serve or chill in a fridge overnight. Use a sharp and hot knife to cut the cake and present individual plated.

Helpful Tips:
1) Can you freeze the cream cheese? Not recommended. The texture will change considerably. It will be more crumbly and less creamy once thawed. it won't be as creamy as it used to be. When frozen, the cream cheese's liquids and solids will separate and this will alter the texture of the cream cheese. Still, frozen and thawed cream cheese is safe to use in cooking and baking.
2) I recommend one thing, do not pour the yolks mixture into the whipped whites because doing so you compress the albumen and all the work is gone. 
3) Use a clean, dry bowl, free of yolk and any other oil or grease while beating egg whites.  
4) Beat the egg whites about 3-5 minutes at middle speed, until, firm and nearly stiff peaks. Beating egg whites is a very important process, It will help your cakes rise with perfectly.
5) Do not overbeat the egg whites,  it will cause cake shrinks after baking.
6) Do not over mix the cake batter, must be less than 25 times to prevert cake shrinks excessively around the edges.
7) Be careful not to over fold, because you will inevitably deflate the batter, causing it to not rise properly in the oven. Fold just until combined, then call it quits.
8) Store in covered containers in the fridge and consumed within 2 days.
9) Do not bake the cake quickly at a high temperature and don't remove hot cake out of a baking pan. otherwise the cake could fall apart and crack on top. Baking cake at a lower temperature will help the cake rise much higher and bake more evenly. 
10) You can test the cake by poking it with a skewer, if it's cooked the skewer will come out clean. if not pop it back in the oven and bake until it's ready. 
11) Cover with foil after a few minutes if the cake of top starts to get brown and continue rising nicely with a golden top.
12) For guaranteed results it's important to follow exactly this recipe and baking at the right temperature also recommended to use an oven thermometer. Please understand that everyone's oven work differently. You should also check the temperature of your oven. if not, your cake won't rise well. 
13) Cake sink or collapse after cooling, because you've turned the hot cake in the oven too soon once baked or pans were greased too heavily or placed too close together in the oven or over-baked.

Recipe Source: Josephine's Recipes

Friday 17 July 2015

How to Make Super Moist and Soft Slider Buns | Dinner Rolls | Hamburger Buns | Chinese Bakery Buns 奶油餐包 - Josephine's Recipes 154


No fail, Just follow this step-by-step instructional video with a secret way to keep the buns super soft and fluffy longer than 2 days. Then, you will never buy buns from the bakery once you try these!


Makes 12 Slider Buns | Dinner Rolls

(A)
1 cup warm milk 40°C
1 tsp active yeast
1 tsp sugar

(B)
2 cups bread flour
2 tbsp sugar

(C)
35g butter

(D)
1 tbsp golden syrup
+ 1 tbsp water

Brush after middle baking and before 5 mins done.
and can brush again after baking.
*For the shine, you'd have to brush it on after baking.

Method:

Day 1:
(A)
1 cup warm milk + 1 tsp sugar + 1 tsp yeast, stir well.
Cover with the glass lid until the bubbles are on the top.

(B)
In a large bowl, add 2 cups bread flour, 2 tbsp sugar, and then add the (A) yeast mixture 
to the flour and mix well. Finally, add the 35g butter, and knead until well combined.

(C)
Cover the dough with the lid and allow to cold rise in the lower part of a fridge overnight.

Day 2:
(A)
Take the dough out of the fridge. Cover with a wet and hot tea towel, 
let it warm up, and it will help to balance the rising temperatures. rest for 1 hour.

(B)
Use your finger test for dough, it will helps you to know exactly when bread has risen enough.

(C)
Transfer the soft and sticky dough on a clean, floured work surface, then kneading well and beat the dough by hand until it is smooth, soft and elastic. You can also check the gluten development with the windowpane Test: pull off a chunk of dough and stretch it with your hands. if it break, repeat step. It should stretch to form a very thin translucent sheet, without tearing.

(D)
Roll & Cut the shape as you desired. Covered with a wet hot towel. 
Allow to rise again (ideally in a warm place) until they double or triple in size.

(E)
Preheat the oven to 150°C, Bake for 30 minutes. In a small bowl, add 1 tbsp golden syrup + 1 tbsp water, and stir well. Brush after middle baking and before 5 mins done and can brush again after baking. *For the shine, you'd have to brush it on after baking. Baking time depends on the size and shape of the bread being baked. This bread is traditionally served warmed from the oven.

Helpful Tips:
1) Everyone's oven is different. PLEASE UNDERSTAND YOUR OVEN!
2) If your dough too tough and hard to knead, the problem you adding too much bread flour. If so, You must add warm milk or water to balance and rise again.
3) You can follow these old fashioned hand kneading method or using machine, like stand mixer, food processor and bread machine instead.
4) Brushing the crust with melted butter, milk, whisked egg, or sugar water on the bread surface as you desired.

Crispy Crust:

Brush before baking.

Soft Crust:

Brush after middle baking
or after baking as you desired.
It will reduce the amount of "crisping up".

Recipe Source: JosephineRecipes.Co.Uk