TOTAL PAGEVIEWS

Search This Blog

Translate

Friday 23 December 2016

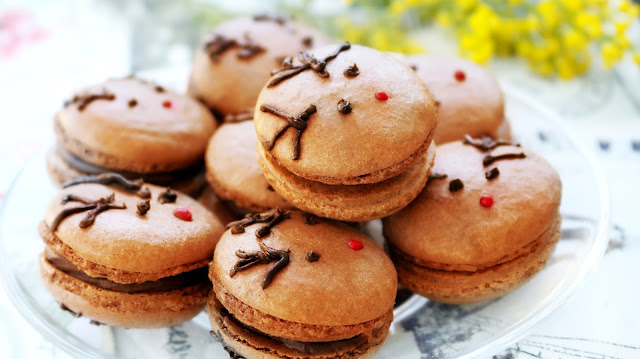
How To Make French Chocolate Macarons | 法式巧克力馬卡龍


After making Macarons more than 10 times with lots of note taking, They aren's super easy, It takes practice and time, effort and lot of love. This recipe for chocolate macarons is my all-time favorite. Tonight and my husband said they are the best macarons he's ever had. You can do whatever shape or pattern you like and I believe it will quickly become your favourite too, by far the tastiest, not too sweet, rich, chocolatey, soft and chewy. Great for a Birthday/Christmas gifts or You can match virtually any cake or party decor to make your celebration special.

Makes 25-30

Ingredients

(A)
4 tbsp powdered sugar, (make your own or purchase on store)
3/4 cup, 14 tbsp, ground almonds, (extra fine)
2 tbsp cocoa powder,  (sieved)

(B)
2 aged egg whites (L)
4 tbsp granulated sugar

(C)
A drop of almond extract

(D)
Filling:
• 100ml fresh double/whipping cream (original pack)
• 100g dark chocolate chips (dr oaetker 1 pack of 100g)

Method:
1) Place the granulated sugar in a food processor and process on high until powder forms, and continue place the ground almonds, blend them very fine.

2) Add the powdered sugar, extra fine ground almonds and sieved  cocoa powder into a bowl, and mix well.

3) Whisk the aging egg whites and add sugar a little bit at a time, until stiff peak, about 3 minutes. then sift the (1) dry ingredients into the whites and fold in using a spatula, lifting and turning gently. Do not over mixed the batter.

4) Fill an piping bag with batter and snip off the corner. Pipe onto the sheet/mat making small blobs around an inch big. Leaving a little space between each. llightly tap your baking mat/sheet after piping your macarons to release the air bubbles and then pop them with a metal skewer/toothpick then leave for 2 hours to dry out or until a skin develops.

5) Baked at 120C for 23 minutes. Let them cool completely before you peel or grab them off of the mat/sheet and store in a airtight container and it keeps fresh in the refrigerator for up to 5 days. of course you can pipe the filling in the same day. When macarons are freshly baked, the shell is crispy outside, chewy inside and they are actually not ready to eat. It taste perfectly when "ripened" in the fridge for 24-48 hours.

6) To make the filling, In a small saucepan, Cook the double cream over middle low heat, add dark chocolate chips, and whip until smooth. Leave to thicken for at least 30 minutes. Pipe filling between two shells.

Helpful Tips:
1) Aging egg whites basically means separating your egg whites and yolks, and storing your egg whites in an airtight container in a fridge for overnight.
2) Allow the shells to stand at fan oven to speed up the drying process about 1 hour, until a skin forms on the surface. The batter should not stick to your fingers. This will prevent them from cracking in the oven.
3) It's best to bake at a lower temperature for a longer period of time and avoid them crack and no feet.
4) If your ground almonds not finely enough or you skip the steps of lightly tap your baking mat/sheet after piping your macarons. This makes for macaron shells not smooth and shiny.
5) Click below link, if you use the kitchen scale to measure by weight for baking instead, http://yummyeasycooking.blogspot.co.uk/2016/12/how-to-make-french-macarons-like-pro.html

Recipe Source: JosephineRecipes.Co.Uk

Thursday 22 December 2016

How To Make French Macarons Like a Pro


After making Macarons more than 10 times with lots of note taking, They aren't super easy, It takes practice and time, effort and lot of love. This recipe for chocolate macarons is my all-time favourite. Tonight and my husband said they are the best macarons he's ever had. You can do whatever shape or pattern you like and I believe it will quickly become your favourite too, by far the tastiest, not too sweet, rich, chocolatey, soft and chewy. Great for a Birthday/Christmas gifts or You can match virtually any cake or party decor to make your celebration special.

Makes 25-30

Ingredients

(A)
96g powdered sugar, (make your own or purchase on store)
80g ground almonds, (extra fine)
12g cocoa powder,  (sieved)

(B)
74g aged egg whites
50g granulated sugar

(C)
A drop of almond extract

(D)
Filling
• 100ml fresh double/whipping cream
• 100g dark chocolate chips

Method:
1) Place the granulated sugar in a food processor and process on high until powder forms, and continue place the ground almonds, blend them very fine.

2) Add the powdered sugar, extra fine ground almonds and sieved  cocoa powder into a bowl, and mix well.

3) Whisk the aging egg whites and add sugar a little bit at a time, until stiff peak, about 3 minutes. then sift the (1) dry ingredients into the whites and fold in using a spatula, lifting and turning gently. Do not over mixed the batter.

4) Fill an piping bag with batter and snip off the corner. Pipe onto the sheet/mat making small blobs around an inch big. Leaving a little space between each. llightly tap your baking mat/sheet after piping your macarons to release the air bubbles and then pop them with a metal skewer/toothpick then leave for 2 hours to dry out or until a skin develops.

5) Baked at 120C for 23 minutes. Let them cool completely before you peel or grab them off of the mat/sheet and store in a airtight container and it keeps fresh in the refrigerator for up to 5 days. of course you can pipe the filling in the same day. When macarons are freshly baked, the shell is crispy outside, chewy inside and they are actually not ready to eat. It taste perfectly when "ripened" in the fridge for 24-48 hours.

6) To make the filling, In a small saucepan, Cook the double cream over middle low heat, add dark chocolate chips, and whip until smooth. Leave to thicken for at least 30 minutes. Pipe filling between two shells.

Helpful Tips:
1) Aging egg whites basically means separating your egg whites and yolks, and storing your egg whites in an airtight container in a fridge for overnight.
2) Allow the shells to stand at fan oven to speed up the drying process about 1 hour, until a skin forms on the surface. The batter should not stick to your fingers. This will prevent them from cracking in the oven.
3) It's best to bake at a lower temperature for a longer period of time and avoid them crack and no feet.
4) If your ground almonds not finely enough or you skip the steps of lightly tap your baking mat/sheet after piping your macarons. This makes for macaron shells not smooth and shiny.
5) Use the kitchen scale to measure by weight for baking instead of using measuring tsp, tbsp and cups. This will give you a better measure of ingredients.

Recipe Source: JosephineRecipes.Com


Tuesday 13 December 2016

How To Make Mini Slider Buns | Dinner Rolls Recipe


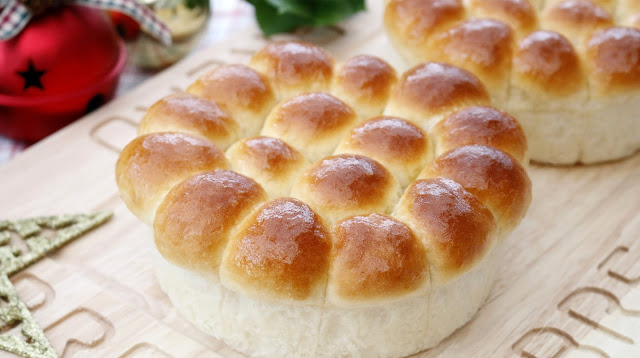
I knead the dough by hand, but recently I have a neck pain and I can't always stand at the counter and knead the bread, so the bread machine is a life saver. This is my own and the quick way when you only need bread, Smells lovely! It's soft and fluffy and it keeps the shape nicely.

Ingredients
(A)
• 21/4 cups bread flour
• 2 tbsp milk powder
• 2 tsp Allinson yeast
• 250ml/1 cup cold milk
• 3 tbsp sugar

(B)
• 1 tbsp olive oil

Makes 41
---15g each dough---

Method: 
1) Place the (A) ingredients, bread flour, milk powder, yeast, cold milk and sugar into the bread pan. close the lid gently.

2) Press the MENU button until desired program ''raw dough'' is selected. so that the machine does all the mixing and kneading. 
Once the process has been completed ''stir 1'', open the lid, add 1 tbsp olive oil to the bread pan, and continue stir 2 until beeps will signal.

3) Press the MENU button until you reach ''ferment''. The bread maker will allow your dough to rise for 30 minutes giving the dough more depth flavor or until beep to signal and then you take it out of the machine. It can be formed into any shape you desire. Sprinkle the almond flakes, or shredded mozzarella cheese on top. if you do, remember adding some sugar on it or whatever you like.

4) The shaped bread allowed to rise in the oven (with boiled water on the underneath) for 30 minutes to 1 hour. Baked at 160C for 18 minutes. Brush melted butter over the crust immediately after baking and cool completely on a wire rack.

Helpful Tips:
1) It's recommended to use an oven thermometer.
2) Store a bread in an airtight bag or airtight container and keep fresh for 2 days or kept in a freezer for 1 month. To reheating and serve, After defrost the bread, It can be wrapped in aluminum foil in the preheated oven for 20 minutes. 
3) Yeast is best stored in the refrigerator, as the fungud in it will be killed at high temperatures. Before using yeast check the production date and storage life of your yeast. Refrigerate it as soon as possible after each use. The main cause of bread failling to rise is bad yeast.
4) You still can use the same recipe and knead by hand or stand mixer instead.


Sunday 11 December 2016

Slider Buns | Dinner Rolls Recipe | 小餐包的做法


I knead the dough by hand, but recently I have a neck pain and I can't always stand at the counter and knead the bread, so the bread machine is a life saver. This is my own and the quick way when you only need bread, Smells lovely! It's soft and fluffy and it keeps the shape nicely.

Ingredients
(A)
• 330g bread flour
• 10g milk powder
• 6g Allinson yeast
• 230g cold milk
• 30g sugar

(B)
• 1 tbsp olive oil

Makes 41
---15g each dough---

Method: 
1) Place the (A) ingredients, bread flour, milk powder, yeast, cold milk and sugar into the bread pan. close the lid gently.

2) Press the MENU button until desired program ''raw dough'' is selected. so that the machine does all the mixing and kneading. 
Once the process has been completed ''stir 1'', open the lid, add 1 tbsp olive oil to the bread pan, and continue stir 2 until beeps will signal.

3) Press the MENU button until you reach ''ferment''. The bread maker will allow your dough to rise for 30 minutes giving the dough more depth flavor or until beep to signal and then you take it out of the machine. It can be formed into any shape you desire. Sprinkle the almond flakes, or shredded mozzarella cheese on top. if you do, remember adding some sugar on it or whatever you like.

4) The shaped bread allowed to rise in the oven (with boiled water on the underneath) for 30 minutes to 1 hour. Baked at 160C for 18 minutes. Brush melted butter over the crust immediately after baking and cool completely on a wire rack.

Helpful Tips:
1) Yeast is best stored in the refrigerator, as the fungud in it will be killed at high temperatures. Before using yeast check the production date and storage life of your yeast. Refrigerate it as soon as possible after each use. The main cause of bread failling to rise is bad yeast.
2) You still can use the same recipe and knead by hand or stand mixer instead.


Monday 5 December 2016

新手必學 ● 香草海绵蛋糕 ● 超鬆軟海綿蛋糕做法


伴有雞蛋,和淡淡的香草味兒,口感輕盈,不太膩人。基本上蛋糕烤好後,就可以吃了。不過也可以用來做各式各樣的蛋糕卷。在蛋糕裝飾上,可以選擇當季的新鮮水果,也可依個人喜愛裝飾上裱花,会更添典雅大方。或做成好吃的生日蛋糕,翻糖蛋糕、結婚蛋糕或各式節日的甜點。

材料:
(A) 蛋黃糊:
• 69克,3个蛋黄
• 22克糖
• 22克玉米油
• 1茶匙香草精
• 28克牛奶
• 48克低筋面粉

(B) 蛋白霜:
• 105克,3個蛋清
• 1/4茶匙的塔塔粉
(可以用1/2茶匙新鮮柠檬汁代替)
• 40克糖

方法:
1)準備一個碗加入(A)蛋黄,糖,玉米油,香草精,牛奶,以及過篩的低粉,攪拌直到麵糊光滑。

2)在另一个乾淨,无油无水的碗,先打发蛋白,之后加塔塔粉,細砂糖分三次,打發至偏干性發泡, 直到出現大彎勾,大约3分钟。

3)蛋黃糊和打發好的蛋白, 一定要用翻拌手法,以免消泡, 並拌勻。

4)烤盤上墊上油紙,把拌勻的麵糊從高處均勻倒入6寸圓型蛋糕模,使用刮板刮平。雙手提起烤盤,左右抖動幾下,使麵糊更平整。摔兩下除去氣泡。

5)放烤箱中層,熱水浴150°c度,上下火烤45分鐘。烤好後,打開烤箱門, 冷卻至少10分鐘。出炉后, 再摔兩下,才不会出现塌陷。每個人的烤箱不一樣, 自己要調整。做好的蛋糕,可以用保鮮模包覆密封,放冰箱,不要超過2天。

版權聲明:分享視頻請註明:來源網址。
凡本網原創作品,允許,不得轉載。
禁止聲明授權使用或二次編輯和重新加載此視頻。
食譜原作者:約瑟芬食譜

Sunday 4 December 2016

Vanilla Sponge Cake 香草海绵蛋糕 | 超鬆軟海綿蛋糕做法


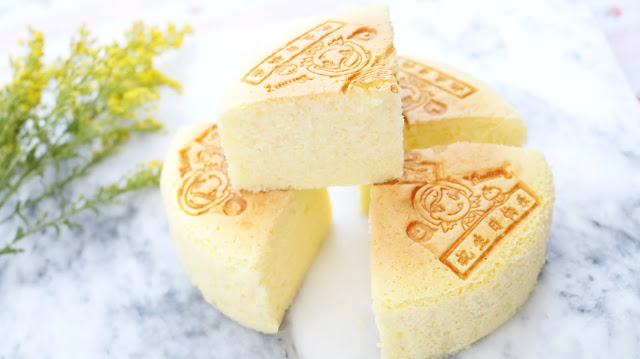
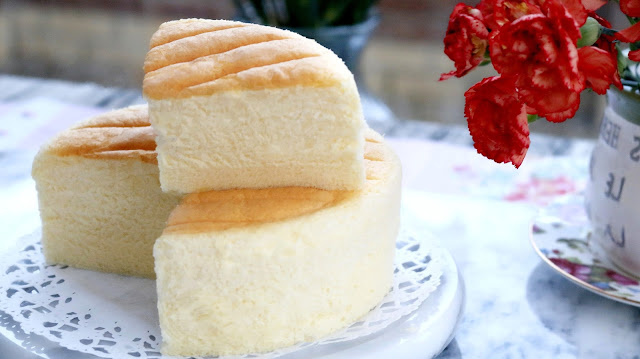
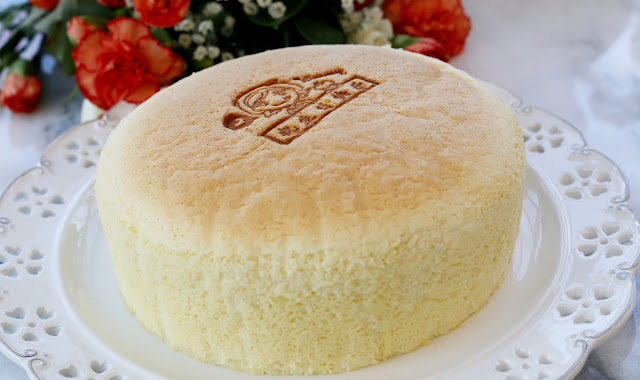
My recipe for a super light, soft and fluffy vanilla sponge cake. Quick and simple sponge cake bases and ready to decorate whatever you like. You can make a Christmas or Birthday really special or even let the birthday king or queen help decorate their own birthday cake.

Ingredients
(A) Egg yolks:
• 3 egg yolks
• 2 tbsp sugar
• 4 tbsp corn oil
• 1 tsp vanilla extract
• 4 tbsp milk
• 6 tbsp cake flour

(B) Egg whites:
• 3 egg whites
• 1/4 tsp cream of tartar
• 4 tbsp sugar

You will need 6-inch round baking pan or 1lb loaf tin. Line with the prepared round of parchment paper in the bottom and the sides and touch with remaining batter.

Method:
1) In a bowl, mix (A) egg yolks, sugar, corn oil, vanilla and milk. Sift cake flour x 3 times and whisk until smooth.

2) In a separate bowl, whisk (B) egg whites until foamy then add cream of tartar and sugar a little bit at a time until to a thick and stiff peak stage, about 3 minutes.

3) Gently fold until the whites and yolk mixture to incorporated. Be careful do not over mix if not your cake won't rise.

4) Pour the mixture into 6 inch round baking pan. Bang the pan 2-3 times to remove any air bubbles.

5) Use a large baking pan for a hot water bath or without the moist heat. Keep the oven rack adjusted to the middle position. Bake at 150°C for 45 minutes or until cake tests done. Leave to cool in the oven with the door open for at least 15 minutes and remove the cake from oven and bang your pan again to prevent it from shrinking when it cools down.

6) Transfer the cake to a plate for serving or use as the basic for a range of fabulous christmas or birthday cake. Any leftover cake can be covered and kept in the fridge for 2 days.

Helpful Tips:
1) Be careful not to open the oven during the baking process.
2) Over mixing cake batter can result in a heavy, sinking fast, closed to rubbery texture.
3) Cut a path down and don't stir and never use an electric mixer for mixing.
4) Cakes shrink or wet if they're not baked thoroughly.
5) Do not over or under-beat the egg whites.
6) Baking cake at a lower temperature will help the cake rise much higher and bake more evenly.
7) Do not bake the cake quickly at a high temperature and don't remove hot cake out of a baking pan. otherwise the cake could fall apart and crack on top.
8) Beating egg whites is a very important process, It will help your cakes rise with perfectly.
9) Cover with foil after a few minutes if the cake of top starts to get brown and continue rising 
nicely with a golden top.
8) Please understand that everyone's oven work differently. You should also check the temperature of your oven. if not, your cake won't rise well.

Recipe Source: JosephineRecipes.Co.Uk

Saturday 3 December 2016

Vanilla Sponge Cake Recipe | Step By Step Baking Guides


My recipe for a super light, soft and fluffy vanilla sponge cake. Quick and simple sponge cake bases and ready to decorate whatever you like. You can make a Christmas or Birthday really special or even let the birthday king or queen help decorate their own birthday cake.

Ingredients
(A) Egg yolks:
• 3, 69g egg yolks
• 22g sugar
• 25g corn oil
• 6g vanilla extract
• 28g milk
• 48g cake flour

(B) Egg whites:
• 3, 105g egg whites
• 1/4 tsp cream of tartar
• 40g sugar

You will need 6-inch round baking pan or 1lb loaf tin. Line with the prepared round of parchment paper in the bottom and the sides and touch with remaining batter.

Method:
1) In a bowl, mix (A) egg yolks, sugar, corn oil, vanilla and milk. Sift cake flour x 3 times and whisk until smooth.

2) In a separate bowl, whisk (B) egg whites until foamy then add cream of tartar and sugar a little bit at a time until to a thick and stiff peak stage, about 3 minutes.

3) Gently fold until the whites and yolk mixture to incorporated. Be careful do not over mix if not your cake won't rise.

4) Pour the mixture into 6 inch round baking pan. Bang the pan 2-3 times to remove any air bubbles.

5) Use a large baking pan for a hot water bath or without the moist heat. Keep the oven rack adjusted to the middle position. Bake at 150°C for 45 minutes or until cake tests done. Leave to cool in the oven with the door open for at least 15 minutes and remove the cake from oven and bang your pan again to prevent it from shrinking when it cools down.

6) Transfer the cake to a plate for serving or use as the basic for a range of fabulous christmas or birthday cake. Any leftover cake can be covered and kept in the fridge for 2 days.

Helpful Tips:
1) Be careful not to open the oven during the baking process.
2) Over mixing cake batter can result in a heavy, sinking fast, closed to rubbery texture.
3) Cut a path down and don't stir and never use an electric mixer for mixing.
4) Cakes shrink or wet if they're not baked thoroughly.
5) Do not over or under-beat the egg whites.
6) Baking cake at a lower temperature will help the cake rise much higher and bake more evenly.
7) Do not bake the cake quickly at a high temperature and don't remove hot cake out of a baking pan. otherwise the cake could fall apart and crack on top.
8) Beating egg whites is a very important process, It will help your cakes rise with perfectly.
9) Cover with foil after a few minutes if the cake of top starts to get brown and continue rising 
nicely with a golden top.
8) Please understand that everyone's oven work differently. You should also check the temperature of your oven. if not, your cake won't rise well.

Recipe Source: JosephineRecipes.Co.Uk


Friday 2 December 2016

巧克力棉花蛋糕 ● 烫面法 + 水浴法 约瑟芬的食谱


相信每个人都喜爱软棉棉的蛋糕。这个烫面法,就是用热油煮可可和加入少许咖啡粉提出香味,之后将面糊烫熟,再加上水浴法,就能做出完美的巧克力棉花蛋糕。吃起来会在你口中融化,香醇浓郁,不甜不腻,而且,绵密松软的口感。闭上眼睛,余香飘渺,意犹未尽,一口接着一口。再加上巧克力淋面,更能带来美味的幸福。依个人喜爱,可装饰,和用来做双层奶油裱花蛋糕,也能做成好吃的生日蛋糕,或各式节日的甜点也不错。

烫面做法:
(一个)
•22g玉米油
•10g可可粉,(过筛)
•1/2茶匙速溶咖啡粉,(过筛)
•66g牛奶
•25克糖

蛋黄糊:
•46克,2个蛋黄
•58克低筋粉
•少许海盐

蛋白霜:
(B)
•70克,2个蛋清
•1/4茶匙的塔塔粉
•45克糖

巧克力镜面淋面酱:
(C)
•150毫升鲜奶油
•100克黑巧克力

做法:
1)准备一个小锅,中小火煮(A)玉米油,大概1-2分钟,加入过筛的可可粉,速溶咖啡粉,不断搅拌,直到完全融化,然后倒入牛奶和糖。 ℃后离火。稍降温后,分2次加入蛋黄,洒上一点海盐,过筛的低筋粉混合至无干粉。这就是烫面了,搅拌直到面糊光滑。

2)在一个干净的碗里,先加塔塔粉,细砂糖分三次,加入蛋白中,打发到偏干性发泡,直到出现大弯勾,大约3分钟。

3)蛋黄糊和打发好的蛋白,一定要用翻拌手法,以免消泡,并拌匀。

4)烤盘上垫上油纸,把拌匀的面糊从高处均匀倒入6寸圆型蛋糕模,使用刮板刮平。双手提起烤盘,左右抖动几下,使面糊更平整。下除去气泡。

5)放烤箱中层,热水浴130°C度,上下火烤45分钟。烤好后,打开烤箱门,冷却至少10分钟。
出炉后,再摔两下,才不会出现塌陷。

6)在一个小锅,中火煮热鲜奶油,离火。加入黑巧克力片,并搅拌,直到光滑。稍慢,15分钟后,倒在蛋糕上。放在冰箱冷藏,不要超过2天。

版權聲明:分享視頻請註明:來源網址。
凡本網原創作品,允許,不得轉載。
禁止聲明授權使用或二次編輯和重新加載此視頻。
食譜原作者:約瑟芬食譜